New to the ESP8266 NodeMCU? You’re exactly where you need to be! The ESP8266 is an incredibly popular, low-cost Wi-Fi chip developed by Espressif Systems, widely used in IoT, smart home automation, and DIY electronics. Whether you’re just starting your journey or looking to refresh your knowledge, this quickstart guide will walk you through everything you need to know. You’ll learn exactly what the ESP8266 is, explore common use cases, discover how to choose the best development board for your project, upload your first sketch, and set the stage for countless innovative projects. Let’s dive in!
What is ESP8266?
The ESP8266 is a powerful, versatile, and affordable Wi-Fi microcontroller developed by Espressif Systems. It can function as a standalone device or as a Wi-Fi module to enhance other microcontrollers with wireless connectivity. For instance, you could easily connect the ESP8266 to an Arduino to provide your Arduino-based projects with seamless Wi-Fi capabilities. However, most users find the greatest value in using it as a standalone device.
When used independently, the ESP8266 allows you to control inputs and outputs similarly to an Arduino but with the significant advantage of integrated Wi-Fi. This feature lets your projects go online, opening numerous possibilities in home automation, IoT applications, and smart devices.
Why has the ESP8266 become so popular? The key reasons include:
- Low Cost: ESP8266 development boards are extremely affordable, with prices starting around $3 or even less, depending on the variant.
- Low Power Consumption: Compared to traditional microcontrollers, the ESP8266 is energy efficient and supports deep sleep mode, reducing power usage significantly and making it ideal for battery-powered applications.
- Built-in Wi-Fi: The ESP8266 can operate in both access points (creating its own Wi-Fi network) and station mode (connecting to existing Wi-Fi networks). This allows it to communicate with internet services, perform HTTP requests, or store data online. Additionally, it can act as a web server, enabling remote monitoring and control via web browsers.
- Arduino Compatibility: Users familiar with Arduino programming can quickly adapt to the ESP8266, as it fully supports Arduino’s familiar programming language and environment.
- MicroPython Compatibility: Additionally, the ESP8266 supports MicroPython, a streamlined version of Python 3 tailored specifically for microcontrollers and embedded systems, making development accessible even to those new to programming.
Features of ESP8266
- Processor: L106 32-bit RISC microprocessor core based on the Tensilica Diamond Standard 106Micro running at 80 or 160 MHz
- Memory:
- 32 KiB instruction RAM
- 32 KiB instruction cache RAM
- 80 KiB user-data RAM
- 16 KiB ETS system-data RAM
- External QSPI flash: up to 16 MiB supported (typically 512 KiB to 4 MiB included)
- Wi-Fi: IEEE 802.11 b/g/n
- Integrated Components: TR switch, balun, LNA, power amplifier, and matching network
- Security: Supports WEP, WPA/WPA2 authentication, and open networks
- GPIO Pins: 17 GPIO pins
- Interfaces:
- Serial Peripheral Interface Bus (SPI)
- I²C (software implementation)
- I²S interfaces with DMA (sharing pins with GPIO)
- UART on dedicated pins, plus an additional transmit-only UART can be enabled on GPIO2
- ADC: 10-bit successive approximation ADC
ESP8266 Specifications
The ESP8266 is a popular and cost-effective microcontroller module known for its Wi-Fi connectivity and ease of use in various IoT applications. Here are its key specifications:
- Processor: Tensilica L106 32-bit RISC microprocessor (Diamond Standard 106Micro core) running at 80 MHz (can be clocked up to 160 MHz).
- Memory:
- 32 KiB instruction RAM
- 32 KiB instruction cache RAM
- 80 KiB user-data RAM
- 16 KiB ETS system-data RAM
- External QSPI flash memory supported up to 16 MiB (typically 512 KiB to 4 MiB included)
- Wi-Fi: IEEE 802.11 b/g/n standards
- Supports Station (STA), Access Point (AP), and both combined modes (AP+STA)
- Integrated TR switch, balun, Low-Noise Amplifier (LNA), power amplifier, and matching network
- Security protocols: WEP, WPA/WPA2, or open networks
- GPIO Pins: Up to 17 GPIO pins
- ADC: 10-bit analog-to-digital converter (ADC)
- Interfaces:
- Serial Peripheral Interface (SPI)
- I²C (software implemented)
- I²S interface with DMA (shares pins with GPIO)
- UART on dedicated pins, plus an additional transmit-only UART (GPIO2)
- Operating Voltage: 3.0V – 3.6V
- Operating Temperature Range: -40°C to +125°C
- Power Efficiency: Supports deep sleep mode for low power consumption, making it suitable for battery-operated projects.
Due to its robust specifications and versatility, the ESP8266 is widely used for home automation, IoT development, and DIY electronic projects.

ESP8266 NodeMCU Pinout
The ESP8266 NodeMCU is one of the most popular Wi-Fi development boards for makers, students, and hobbyists working on IoT and automation projects. This board combines the ESP8266 chip, USB interface, and easy-access GPIO pins, making it perfect for rapid prototyping.
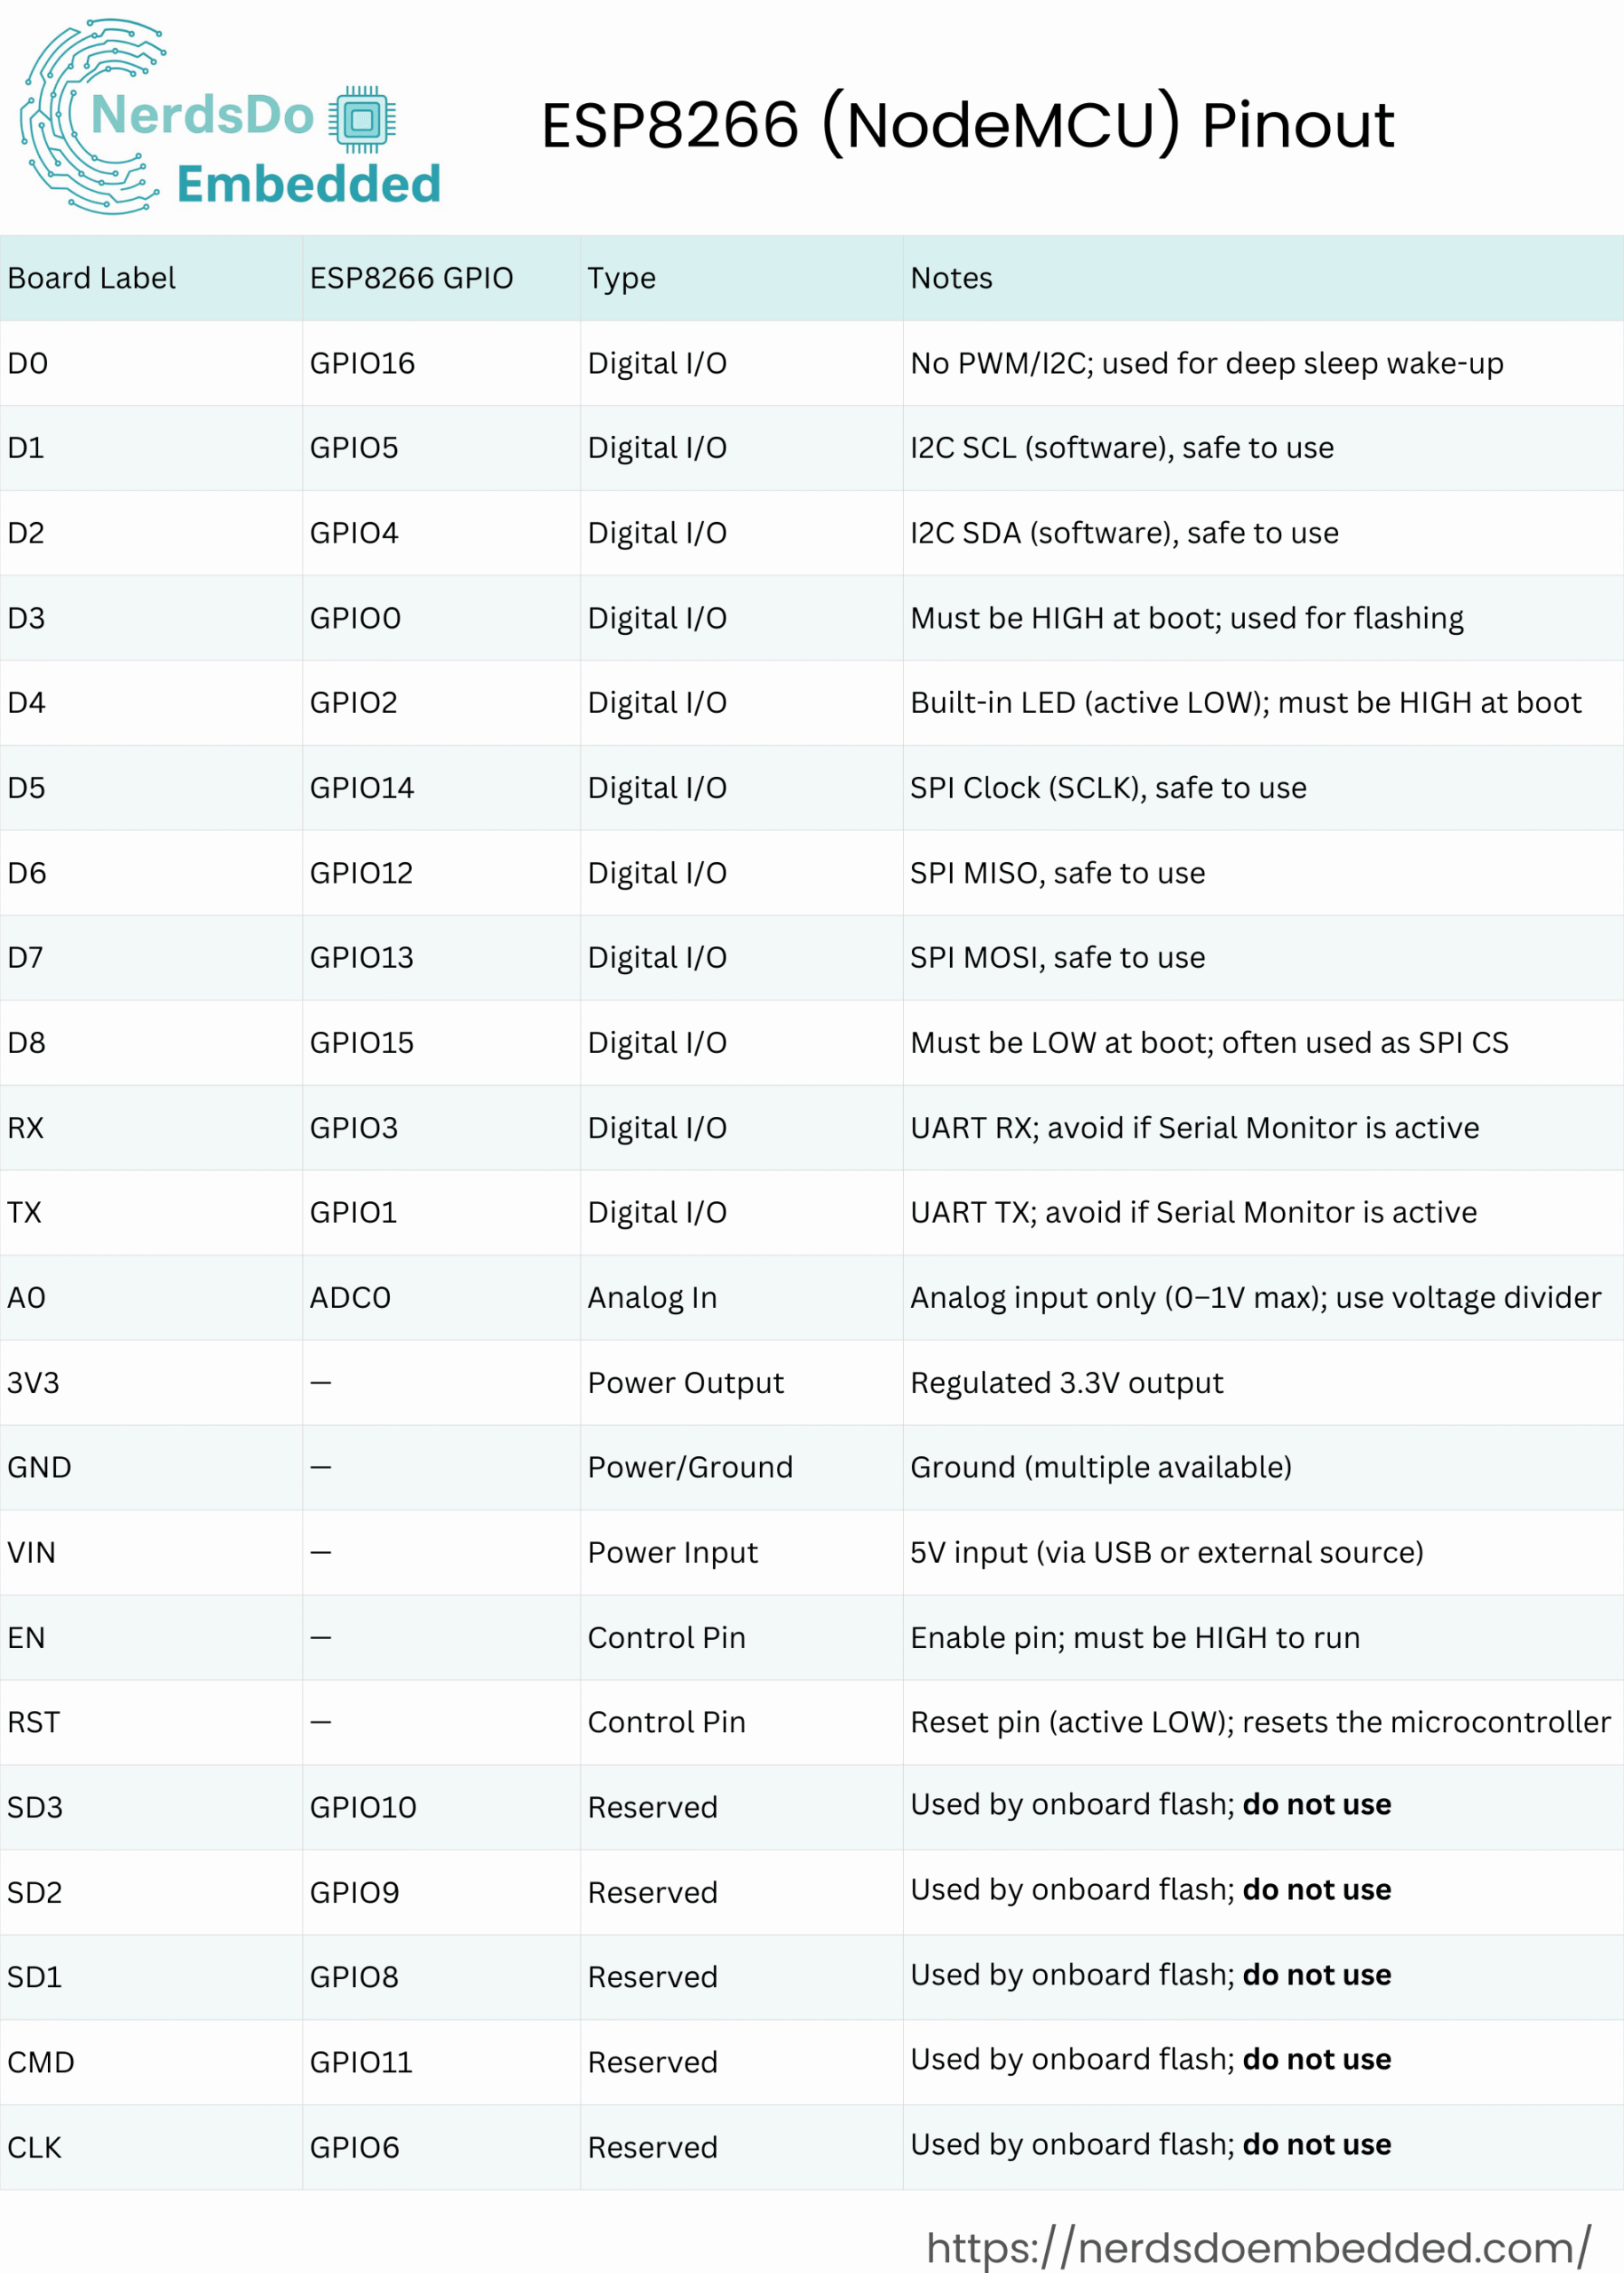
In this guide, we’ll explore the pinout of ESP8266 NodeMCU, so you know exactly which pins to use for power, digital I/O, analog input, communication protocols like I2C and SPI, and more.
What Is a Pinout?
A pinout is like a map of the board — it shows which physical pins connect to which internal GPIOs of the ESP8266 chip. Understanding the pinout is crucial to avoid boot issues and make sure the features (like PWM, UART, or ADC) work as expected.
Power Pins
The NodeMCU has three types of power pins:
- VIN – Input voltage (usually 5V from USB or external adapter)
- 3V3 – Regulated 3.3V output for powering low-voltage devices
- GND – Ground connection (multiple pins available)
GPIO Numbering
One common confusion with NodeMCU is the mismatch between printed labels (D0, D1, etc.) and the actual ESP8266 GPIO numbers.
Here are examples:
- D0 = GPIO16
- D1 = GPIO5
- D2 = GPIO4
When programming (e.g., in Arduino IDE), you must use the GPIO number, not the silkscreen label.
ESP8266 vs ESP32 – What’s the Difference?
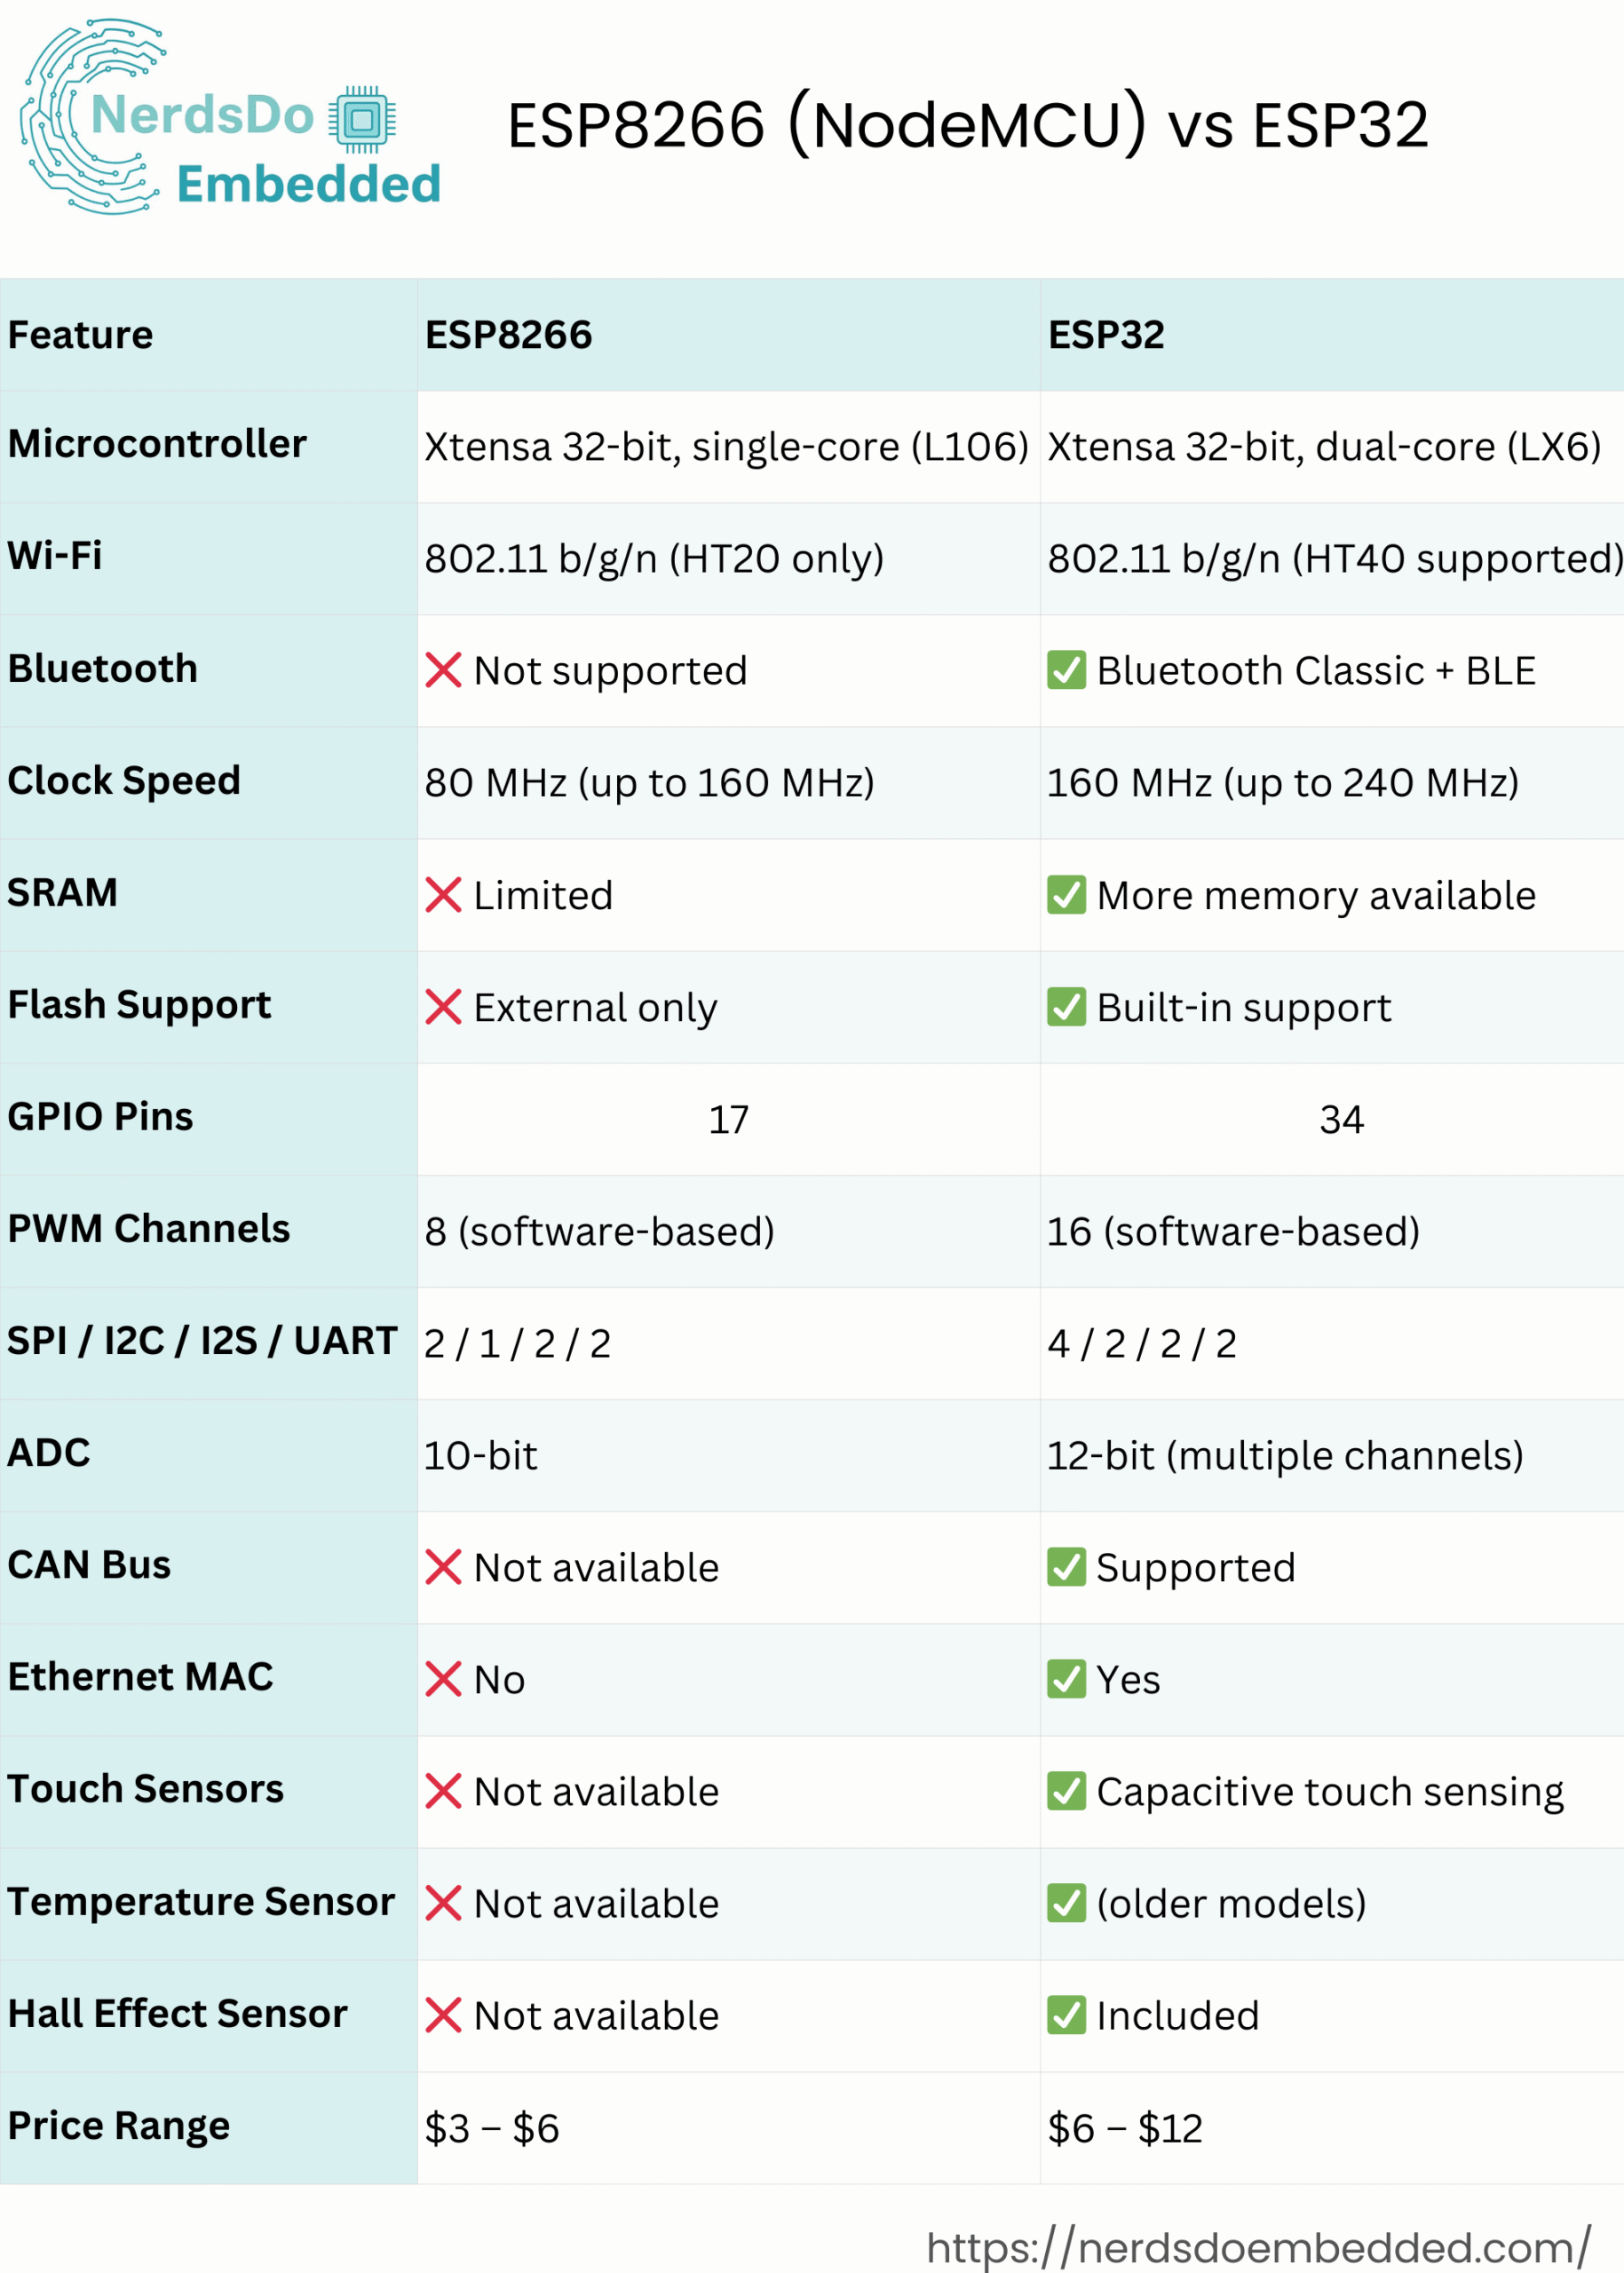
The ESP32 is the successor to the ESP8266, offering significant upgrades in performance, features, and connectivity. While the ESP8266 is still widely used and great for many IoT applications, the ESP32 is more powerful and better suited for complex or future-proof projects.
If you’re just getting started, we recommend going with the ESP32. But if you already have an ESP8266, it’s still a solid choice with strong community support and great compatibility for most DIY needs.
ESP8266 Versions – Overview of Popular Modules
The ESP8266 comes in several versions and module types, each tailored for different use cases. Whether you’re building a smart switch, sensor node, or a full IoT controller, choosing the right ESP8266 version can save you time and simplify your project.
Common ESP8266 Modules
There are multiple hardware variants of the ESP8266 chip, but the most commonly used are:
- ESP-01
- ESP-12E
- ESP-12F
- ESP-07
- ESP-03
- ESP-13
Each version differs in terms of size, number of GPIOs exposed, antenna type, and flash memory.
ESP8266 ESP-01
- The smallest and cheapest version
- Only 2 GPIOs are available (GPIO0 and GPIO2)
- Comes with 2×4 pin header
- Ideal for basic Wi-Fi enablement tasks
- Not breadboard-friendly without an adapter
Best for: simple projects like Wi-Fi relays or status indicators.
ESP8266 ESP-12E
- One of the most popular modules
- Breaks out 11 GPIOs including SPI, UART, ADC
- Integrated PCB antenna
- Used in most NodeMCU development boards
- Breadboard-friendly when mounted on NodeMCU
Best for: general-purpose IoT development
ESP8266 ESP-12F
- Improved version of ESP-12E
- Better RF performance and more stable Wi-Fi
- The pinout is identical to ESP-12E
- Compatible with most ESP-12E projects and boards
Best for: reliable Wi-Fi projects in noisy environments
Other Versions (ESP-03, ESP-07, ESP-13)
| Version | Features |
|---|---|
| ESP-03 | Tiny form factor, ceramic antenna |
| ESP-07 | External antenna + metal shield |
| ESP-13 | Same as ESP-12E but with more flash |
ESP8266 NodeMCU Development Boards
The ESP8266 NodeMCU is one of the most popular Wi-Fi-enabled microcontroller boards in the maker and IoT communities. These boards combine the powerful ESP8266 chip with additional components like USB interfaces and voltage regulators, making them easy to program and power. With multiple variants available—such as the ESP-01, ESP-12E, and development kits from NodeMCU and Wemos—users can choose the right board based on their specific project requirements. Whether you’re a beginner working on basic automation or a developer building advanced IoT systems, the ESP8266 family offers a versatile and cost-effective solution.
How to Choose an ESP8266 NodeMCU Development Board?
There are many versions of ESP8266 boards offered by various manufacturers. Though they all operate using the same core chip, some models are better suited for specific applications than others. Here are some key factors to consider when selecting the right ESP8266 development board for your project:
- USB-to-Serial and Voltage Regulation: Most beginner-friendly boards include an onboard USB-to-UART bridge and voltage regulator. These simplify uploading code from your computer and provide stable power to the chip.
- BOOT and RESET Buttons: These buttons help you easily place the board into programming (flashing) mode or perform a manual reset when needed—both useful during development.
- Pinout Layout and GPIO Accessibility: Check if the board provides a clear and accessible pinout diagram. Some boards expose more GPIO pins than others, which is crucial if your project needs multiple peripherals like sensors, displays, or relays.
- Board Size: Boards like the ESP-01 are compact and perfect for space-constrained projects, but they offer fewer GPIOs. In contrast, larger boards like the NodeMCU devkit provide more features and I/O but take up more space.
- Antenna Type: While most boards include an onboard PCB antenna, a few come with a connector for an external antenna, which is useful if your project demands a longer Wi-Fi range or improved signal stability.
Which one is best for beginners?
If you’re just starting, go with a board with built-in USB connectivity, plenty of GPIOs, and widespread support like the NodeMCU ESP8266-12E or the Wemos D1 Mini. These boards are reliable, easy to program, and well-documented across the community.
ESP8266-12E NodeMCU Kit
The ESP8266-12E NodeMCU Kit is one of the most popular and widely adopted development boards based on the ESP8266 Wi-Fi microcontroller. Ideal for beginners and advanced users alike, this board features 4MB of flash memory, 11 usable GPIO pins, and one ADC (Analog-to-Digital Converter) input with a 10-bit resolution—perfect for reading analog sensors in IoT projects.
One of the major advantages of the NodeMCU 12E board is its built-in voltage regulator and USB-to-Serial converter, which allows you to upload code directly via a micro USB cable without needing any external programmer or FTDI module. Most versions come with either the CP2102 or CH340 USB interface chip.
The board also includes:
- An onboard PCB antenna for Wi-Fi connectivity.
- RESET (RST) and FLASH buttons for easy firmware uploading and system reset.
- A built-in LED connected to GPIO2, is commonly used for debugging or simple status indications.
With its compact design, easy-to-use pinout, and strong community support, the ESP8266-12E NodeMCU Kit is a go-to choice for countless Wi-Fi-based automation, IoT, and home electronics projects. If you’re new to the ESP8266 ecosystem, this board is highly recommended as your starting point.
How to Program the ESP8266 NodeMCU?
There are several ways to program the ESP8266 using different programming languages, including Arduino C/C++ with the Arduino core for ESP8266, Lua (NodeMCU firmware), and others. However, the most popular and beginner-friendly approach is using the Arduino programming language with either the Arduino IDE or Visual Studio Code (with PlatformIO). For newcomers, we highly recommend starting with the Arduino IDE due to its simplicity, ease of setup, and vast community support. Throughout this article, we’ll focus on programming the ESP8266 using the Arduino IDE, which provides a smooth development experience for building Wi-Fi-enabled IoT projects
Programming ESP8266 with Arduino IDE
To get started with programming your ESP8266 board, you’ll need an Integrated Development Environment (IDE) to write and upload your code. For beginners, the Arduino IDE is the most recommended option. While it may not be the most advanced IDE available, it’s lightweight, easy to use, and perfect for getting started with embedded development. Once you’re comfortable and start building more advanced projects, you can explore Visual Studio Code with the PlatformIO extension for a more powerful and flexible development setup.
But if you’re new to the ESP8266, the Arduino IDE is the best place to begin.
Installing Arduino IDE
To run the Arduino IDE smoothly, your computer must have Java installed. If it’s not already installed, you can download the latest version from the official website: java.com/download.
Downloading and Installing Arduino IDE
Download Arduino IDE
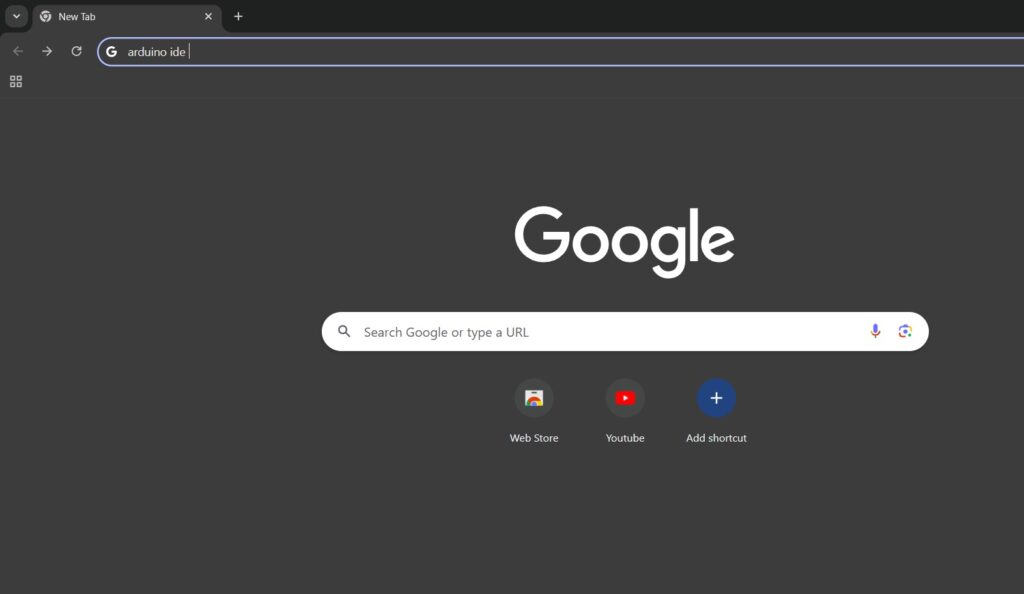
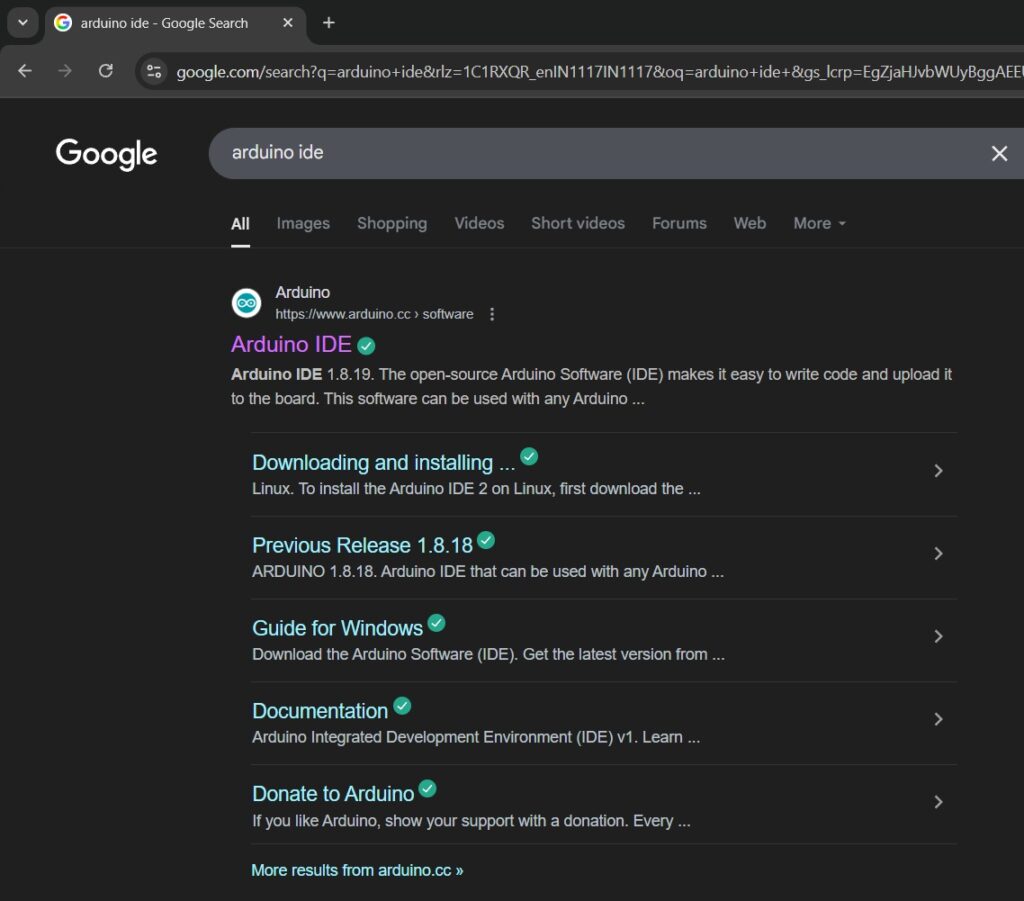
Open your web browser and search for Arduino IDE.
Visit the official Arduino website and navigate to the downloads page. https://www.arduino.cc/en/software/
Select the Windows 64-bit Installer.

Begin Installation
Locate the downloaded file (arduino-ide_x.x.x_Windows_64bit.exe) in your downloads folder.

Double-click the file to start the installation process.
License Agreement
Read and accept the Arduino IDE license agreement by clicking “I Agree”.

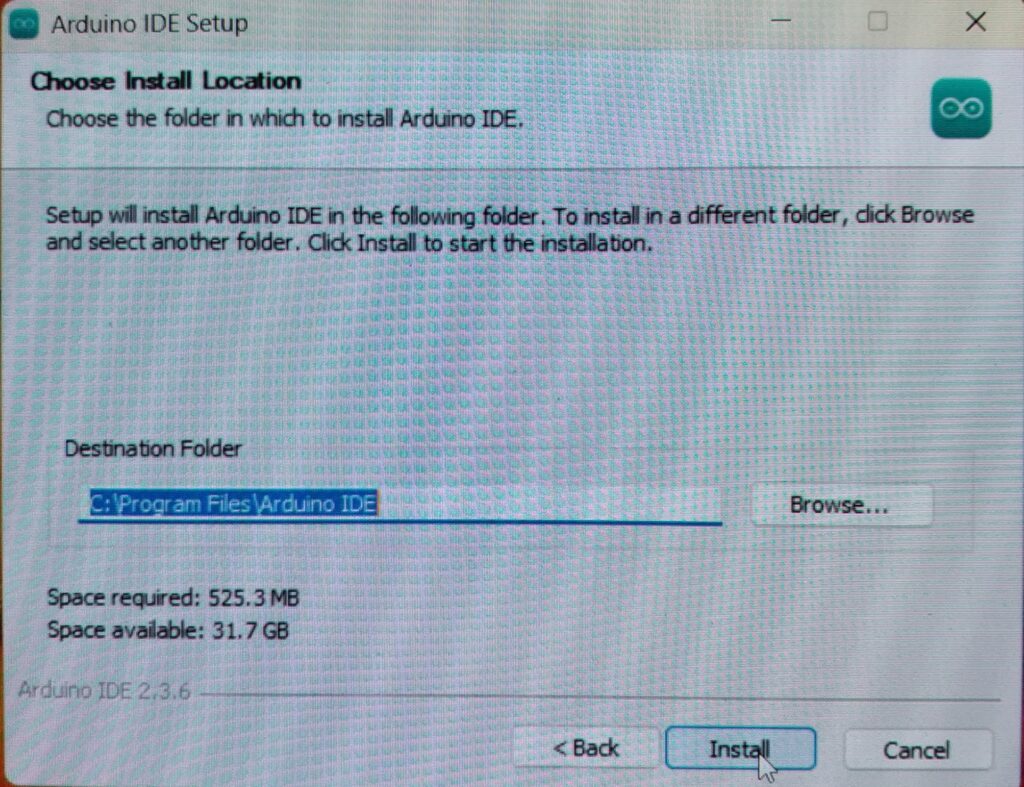
Choose Installation Folder
The default installation folder is typically C:\Program Files\Arduino IDE.
You can change this if you prefer, otherwise click “Install”.
Installing Arduino IDE
Wait for the installation process to complete. This may take a few minutes.

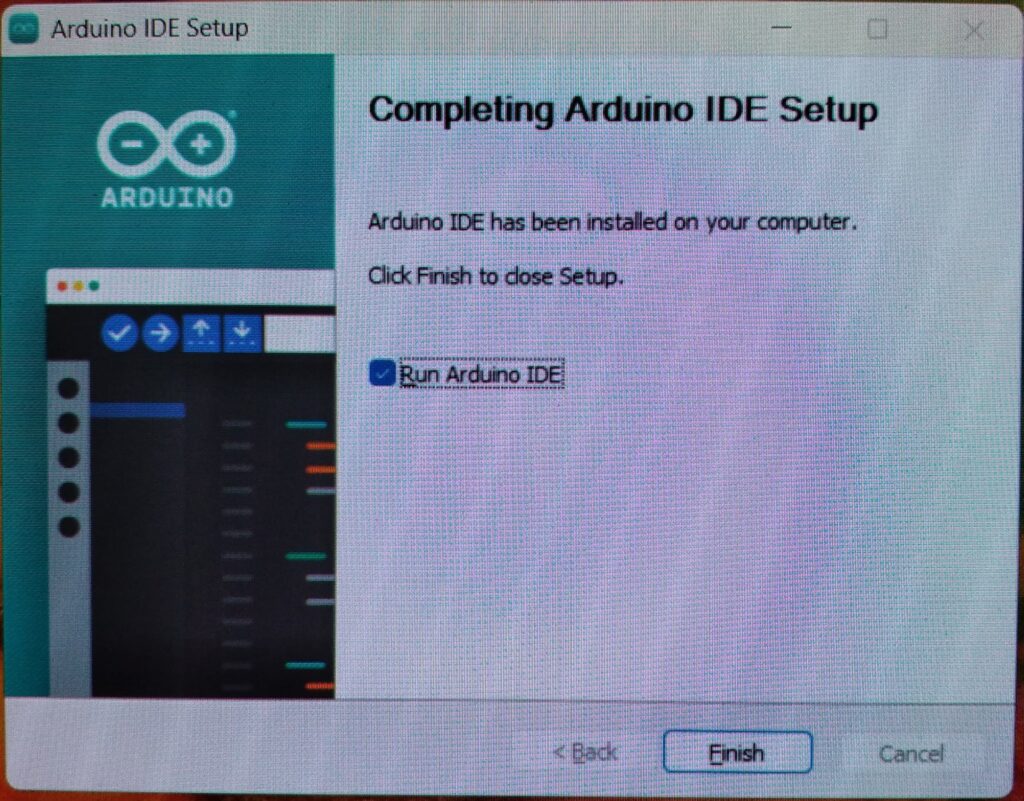
Completing Installation
After installation finishes, check the option “Run Arduino IDE” if you’d like to open it immediately.
Click “Finish” to complete the installation.
Verify Installation
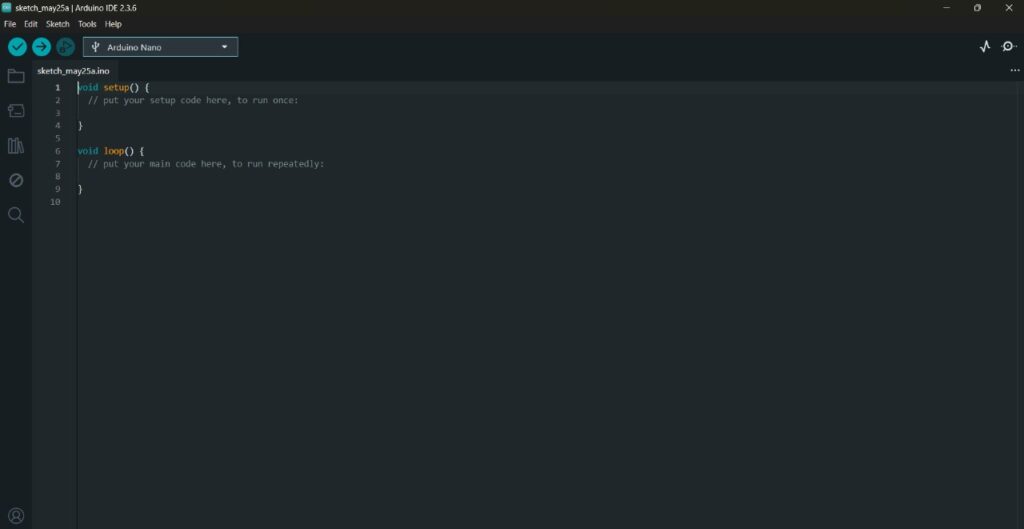
Arduino IDE opens and shows an empty sketch.
Verify the IDE shows a blank template with void setup() and void loop() functions.
Installing the ESP8266 NodeMCU in Arduino IDE
To install the ESP32 board in your Arduino IDE, follow these next instructions:
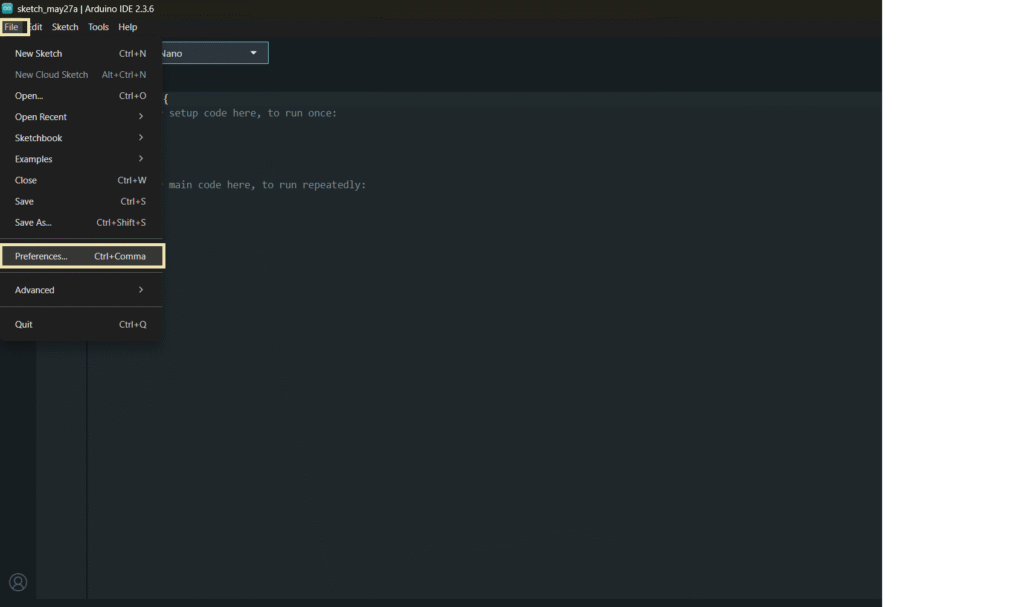
1. In your Arduino IDE 2, go to File > Preferences.
2. Copy and paste the following line to the Additional Boards Manager URLs field.
https://arduino.esp8266.com/stable/package_esp8266com_index.json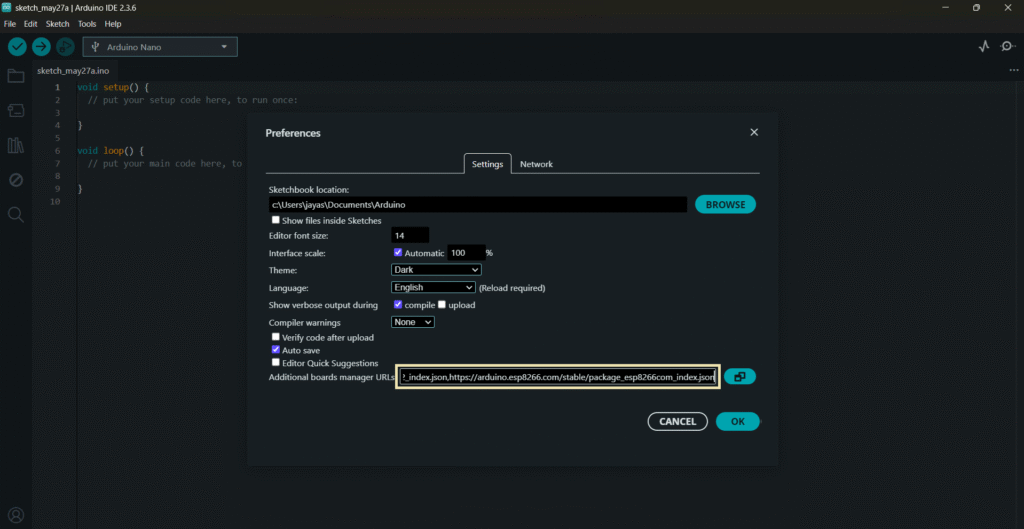
Note: if you already have the ESP32 boards URL, you can separate the URLs with a comma, as follows:
http://arduino.esp8266.com/stable/package_esp8266com_index.json, https://raw.githubusercontent.com/espressif/arduino-esp32/gh-pages/package_esp32_index.json
3. Open the Boards Manager. You can go to Tools > Board > Boards Manager… or simply click the Boards Manager icon in the left-side corner.
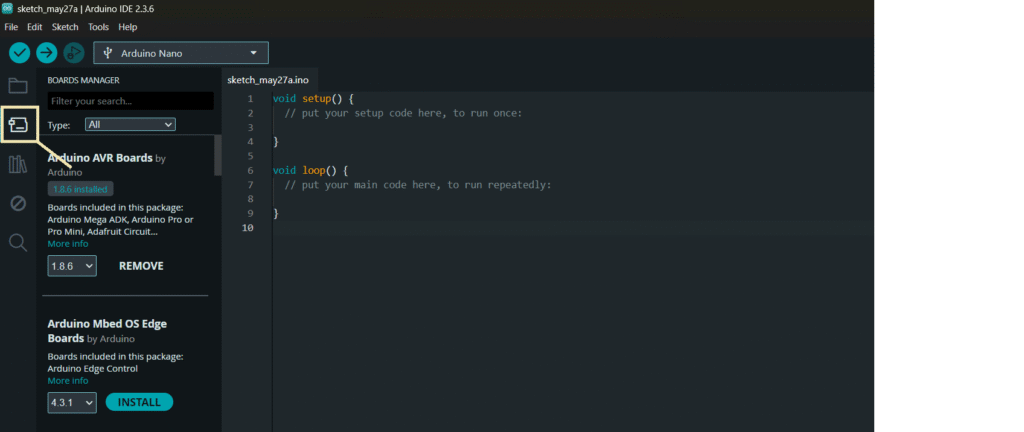
4. Search for ESP8266 and press the install button for esp8266 by ESP8266 Community.
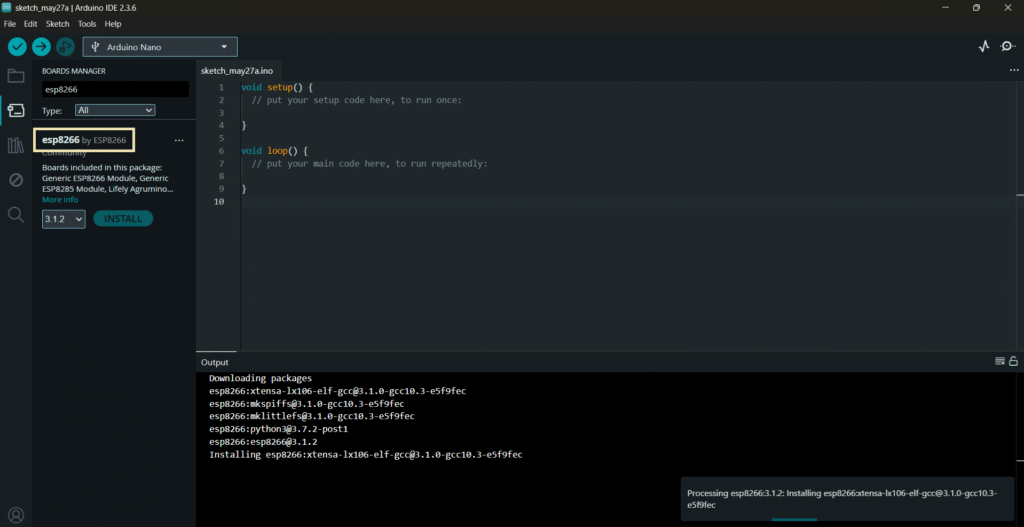
After this, restart your Arduino IDE.
Then, go to Tools > Board and check that you have ESP8266 boards available.

Validating Your ESP8266 Setup: From Installation to First Program
To ensure the ESP8266 add-on is installed correctly, we’ll flash a simple LED blink program using GPIO 2.
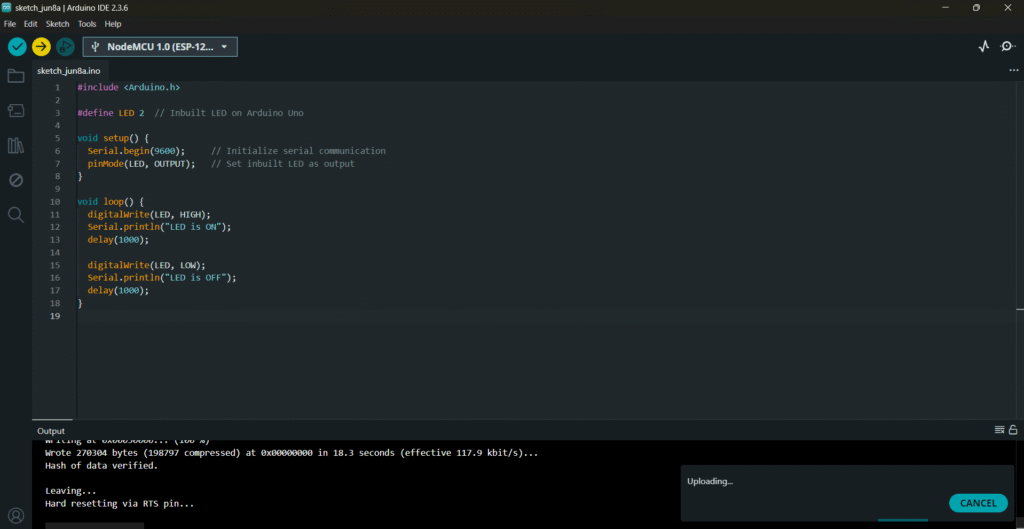
Copy the following code to your Arduino IDE:
#include <Arduino.h>

#define LED 2  // Inbuilt LED on Arduino Uno

void setup() {
  Serial.begin(9600);     // Initialize serial communication
  pinMode(LED, OUTPUT);   // Set inbuilt LED as output
}

void loop() {
  digitalWrite(LED, HIGH);
  Serial.println("LED is ON");
  delay(1000);

  digitalWrite(LED, LOW);
  Serial.println("LED is OFF");
  delay(1000);
}
Uploading the sketch
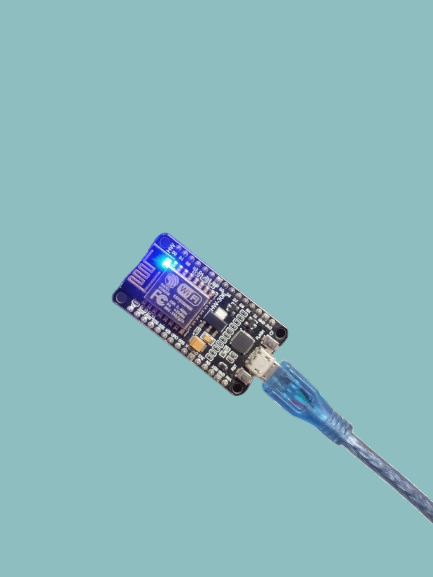
Connect your ESP8266 development board to your computer using a USB cable.
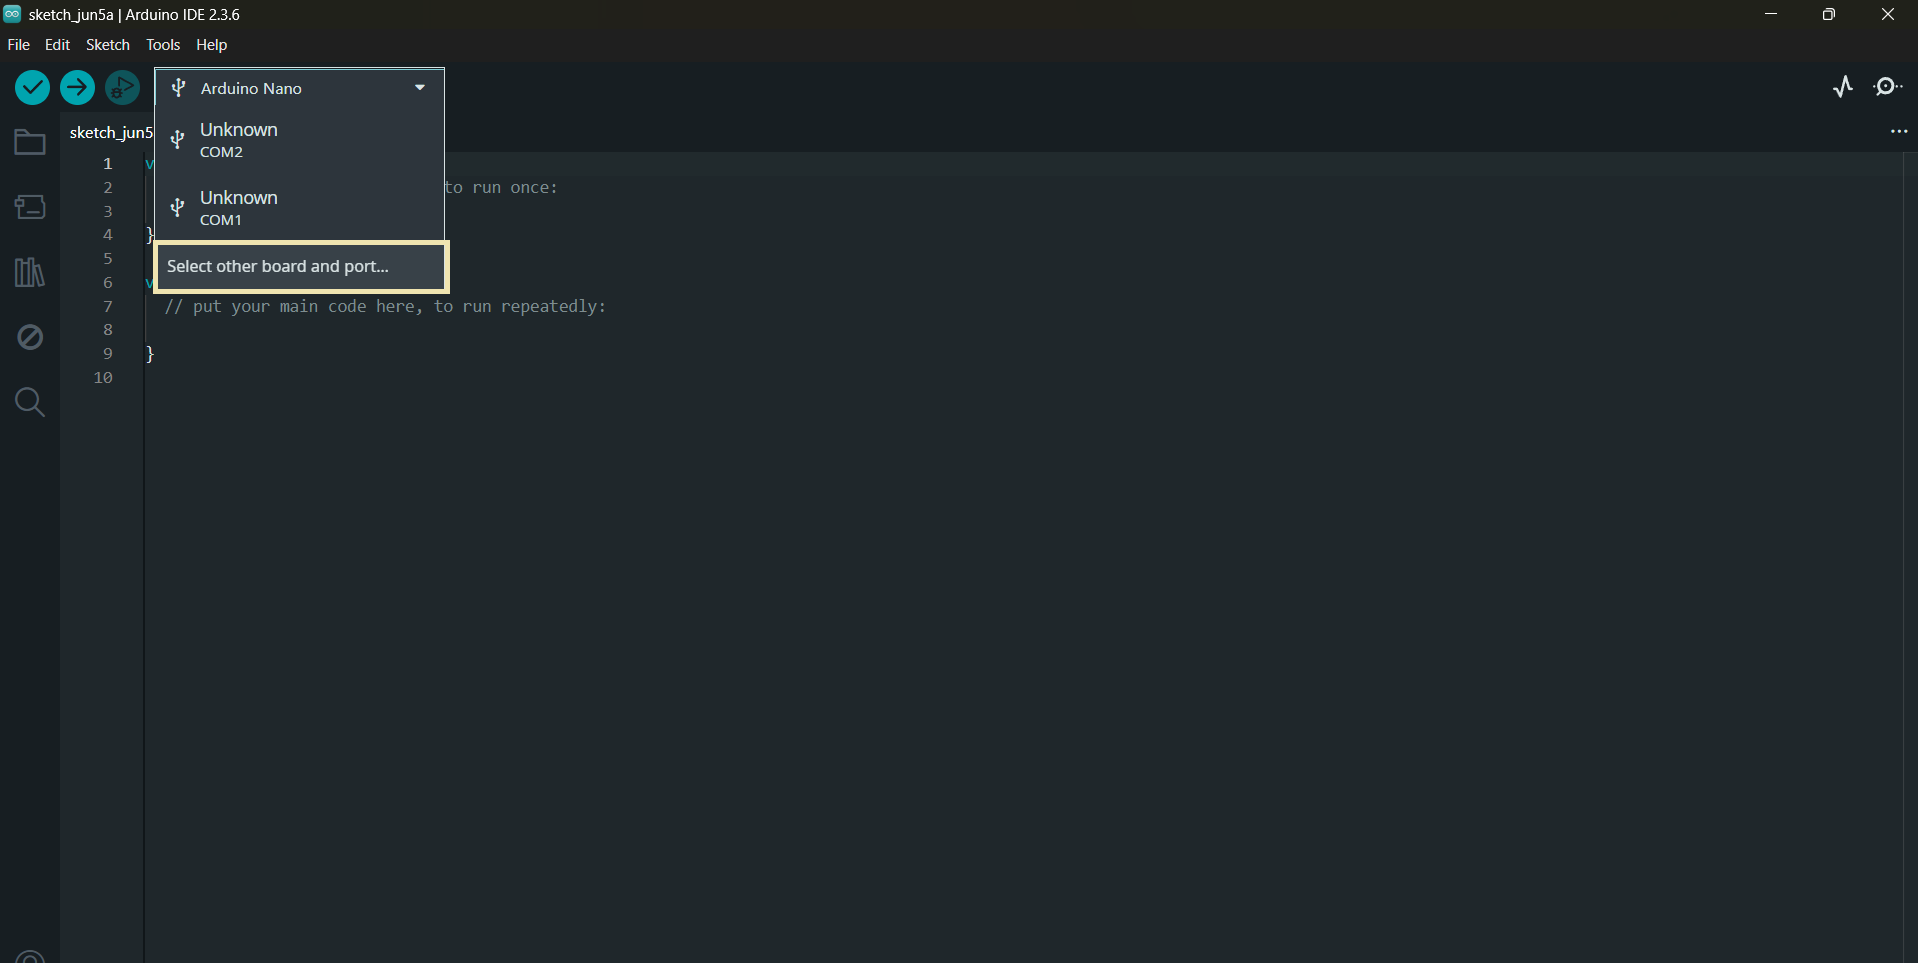
Before uploading the code, select your board. On the top drop-down menu, click on “Select other board and port…“
A new window, as shown below, will open. Search for your ESP8266 board model
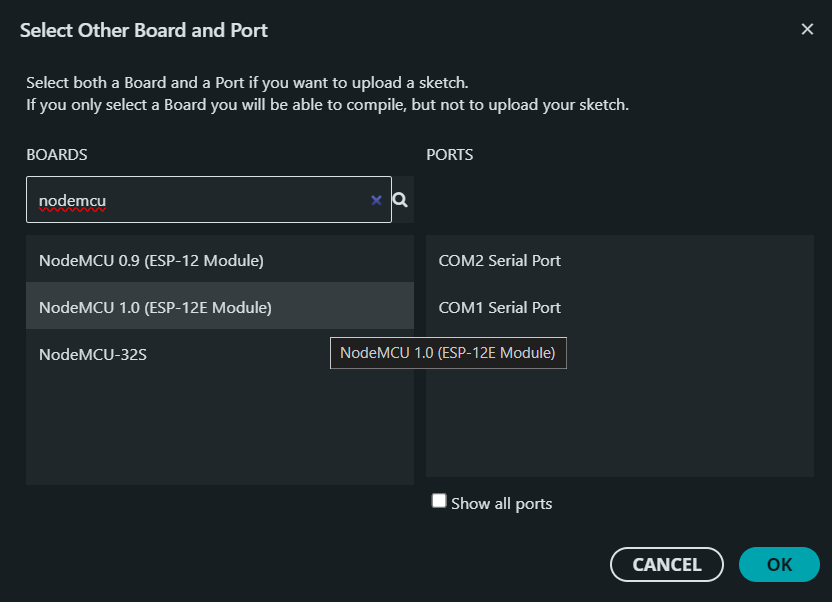
Select the ESP8266 board model you’re using, and the COM port. In our example, we’re using the NodeMCU 1.0 board. Click OK when you’re done.
Now, you need to click on the Upload button
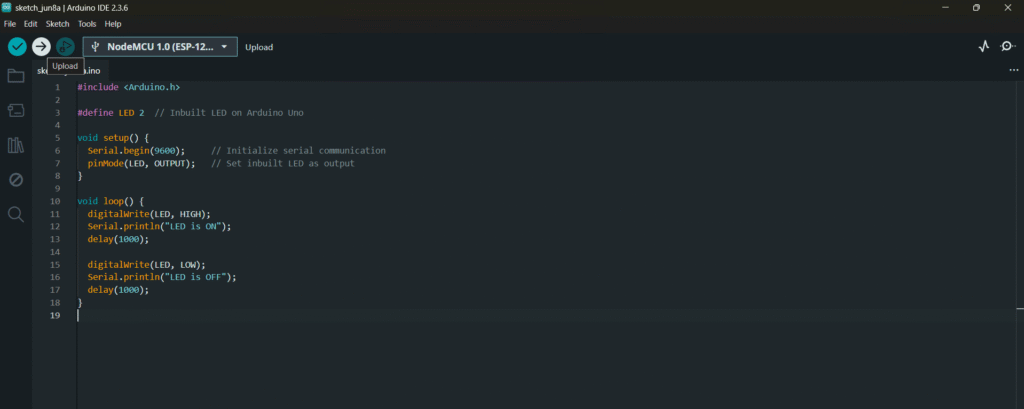
After a few seconds, the upload should be complete.
The ESP8266 on-board LED should be blinking every second.
With its compact size, Wi-Fi capability, and beginner-friendly development environment, the ESP8266 NodeMCU is a powerful tool to kickstart your IoT journey. From understanding the board’s specs and pinout to writing your first LED blink code, you now have a solid foundation to explore more advanced projects.
FAQ
1. What is the ESP8266 NodeMCU used for?
ESP8266 NodeMCU is commonly used in IoT projects like smart home automation, wireless sensor networks, and remote device control due to its built-in Wi-Fi and microcontroller.
2. How do I power the ESP8266 NodeMCU?
You can power the NodeMCU using a micro USB cable connected to your computer or via a regulated 3.3V power supply to the VIN and GND pins.
3. Can I program ESP8266 NodeMCU using Arduino IDE?
Yes, after installing the necessary board support package via the Arduino IDE Board Manager, you can easily write and upload sketches to the NodeMCU.
4. What are the key differences between ESP8266 and NodeMCU?
ESP8266 refers to the Wi-Fi chip itself, while NodeMCU is a development board that includes the ESP8266 chip, USB interface, voltage regulator, and GPIO pins for easy prototyping.
5. Which pin is used to control the onboard LED in NodeMCU?
The onboard LED on NodeMCU is connected to GPIO2 (D4), and you can control it using digitalWrite(2, HIGH/LOW) in your Arduino code.